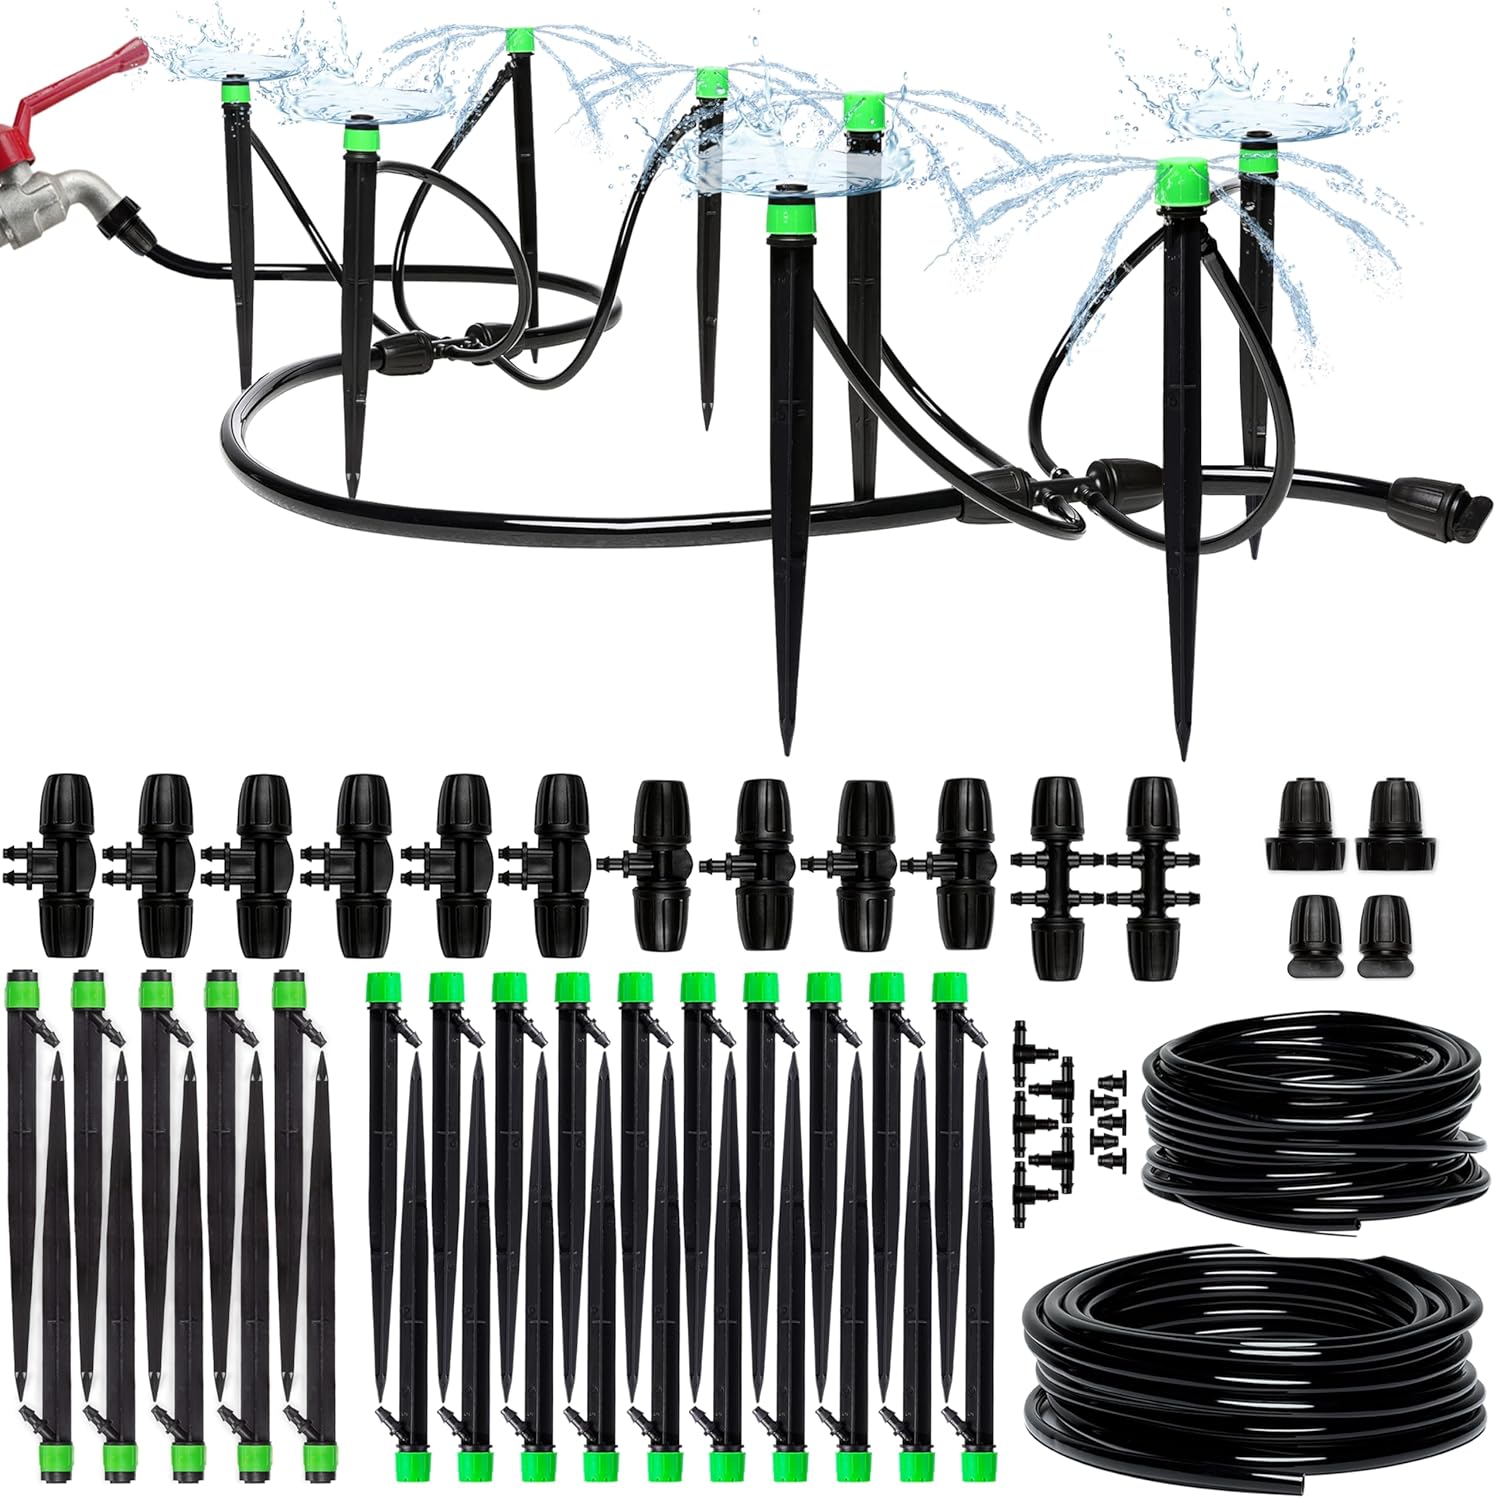
What's in the box?
- 50ft - 1/4” Distribution Tubing
- 50 ft - 5/16” Distribution Tubing
- 20 x Drip Emitters Stream
- 10 x Drip Emitters Vortex
- 2 x 3/4” to 5/16” Coupler
- 2 x 5/16” Tubing End Plug
- 5 x 1/4” Tubing End Plug
- 2 x 5/16” to 1/4” - 4 Ways Coupler
- 6 x 5/16” to 1/4” - 2 Ways Coupler
- 4 x 5/16” to 1/4” - 1 Way Coupler
- 5 x 1/4” Tee Splitter
- A gift from our team
Check our Installation Video for the Carpathen Drip Irrigation Kit
Installation Steps
IMPORTANT steps to take before installation
Before installing, please make sure you have some form of filtration and pressure regulation installed on your water source.
Why is it important:
Filtration: without filtration, the couplings and emitters have small openings that can clog with debris or sediments.
Pressure regulation: pressure over 45 PSI can blow off the fittings and damage the micro irrigation system over time. You can find a wide variety of inexpensive pressure regulators on Amazon.com or at your local home improvement store.
Not all the included pieces need to be installed in one system. In order to offer you a fully customisable irrigation system, we included many more than enough pieces of each kind. Keep the leftover items like spare parts.
Naturally, the water pressure in the system drops a bit with every emitter installed. Depending on your water source pressure, you may install a greater or lesser number of emitters until the limit is reached and the water will stop flowing from some of the emitters. Normally, with a water pressure of 45 PSI, a system with a total number of either 20 360 Stream Emitters OR 12 Vortex Emitters should function without problems. Please feel free to experiment and create your unique combination of emitters in the system.
Technical Information:
The emitters are designed to work with a pressure of between 15 and 45 PSI. Maximum water volume delivered by a single emitter:
360 Stream
- 60 Gallons/hour at 45 PSI
- 55 Gallons/hour at 35 PSI
- 45 Gallons/hour at 20 PSI
Vortex
- 45 Gallons/hour at 45 PSI
- 35 Gallons/hour at 35 PSI
- 30 Gallons/hour at 20 PSI
Both emitter types have an adjustable range up to a diameter of 3-4 feet.
The 360 Stream Emitter delivers water in an array of streams, being ideal for shrubs and trees. The Vortex Emitter evenly covers a full circle, making it perfect for a landscape or garden.
Step 2 - Running the needed length
Run the needed length of 5/16” tubing from the water source through the designated area, between your plants or raised beds.
Step 3 - Cutting the main line and attaching the couplers
Near each group of plants or raised bed, use a good pair of scissors to cut into the main line and install one of the three types of couplers (G, H, or I) according to your needs (with 1, 2, or 3 ways out).
Step 4 - Preparing the tubing from the main line to the plant
Run the needed length of 1/4" distribution tube from the main line to your plant (try not to use more than five feet of tubing per branch).
Step 5 - Attaching the emitters
Connect one end of the 1/4" tube to the barbed coupling and the other to an emitter of your choice (C or D). Make sure the tube covers the barb entirely so it won’t come out when you turn on the water.
Obs: The barbs are designed to be slightly larger than the 1/4" tubing to prevent it from sliding back off. If you find it too difficult to push the tube all the way through, soften the tube end by slightly heating it with a heat gun or soak it in hot water. The tubing will slide on very easily and contract over the barb when cools down, sealing the connection.
Step 6 - Inserting the emitters
Insert the emitter’s stake in the ground. Please do not use excessive force. If the ground is too hard, water it a bit to soften it before inserting the stake.Place the emitter so it wets both the plant root and the adjacent soil (the rootball).
Step 7 - Install more than one emitter on the same branch
If you need to install more than one emitter on the same branch, use the scissors to make a cut and use a 1/4” tee splitter (J) to split it.
It's best to use one, or at the most two emitters on the same branch to prevent the outflow from being impeded.
Step 8 - Closing the ends of the 1/4” tubing
If for any reason you need to close an end of the 1/4” tubing, you can use a plug (K) to do so. You can close an unneeded way out of a Coupler using a small piece of tubing and a Plug.
Step 9 - Opening the water source
Once all the emitters are installed, with the end of the main line tubing still open, open the water source to flush out any debris or dirt that may have entered the line during installation. Continue flushing until water runs clear and then close it.
Step 10 - Closing the main line
Close the main line tubing with 15/16” Plug (F) and open the water source again.
Step 11 - Inspect circuit
Inspect the entire circuit for leaks or tube kinks.
Inspect each emitter and adjust the water flow to desired level by screwing/unscrewing the green cap. It can be adjusted from barely dripping near the stake up to a maximum of 50-60 Gallons/hour with a radius of over 3-4 feet, depending on the water pressure in the system.

